


.jpg)


%2B(650x228).jpg)


 Here is the “naked” card. I pick out the spots where tatting will work and leave the rest alone. In this case, I’m tatting yellow blossoms, green stems, and the leaves below. The leaf shape is perfect for clunies, but frankly, I’m not in the mood to make so many clunies so I’m just going to approximate the leaves on the stems and there will be a mass of green for the bottom…vague and not very precise. This is how some paintings are done…with suggestive shapes and colors but nothing really defined. I’m not particularly fond of the “frame” on the card and I could tat a simple edging instead. I need this card fairly quickly though as well as 2 others so I will not take the time to make an edging for this one.
The thread I’ve used is size 60/70/80 throughout. A bigger card could take bigger thread but this one is only 3 x 5 inches and bigger thread doesn't permit much detail on a card this size. Even though I'm not using much detail, I can still tat more of what is there than if I used bigger thread.


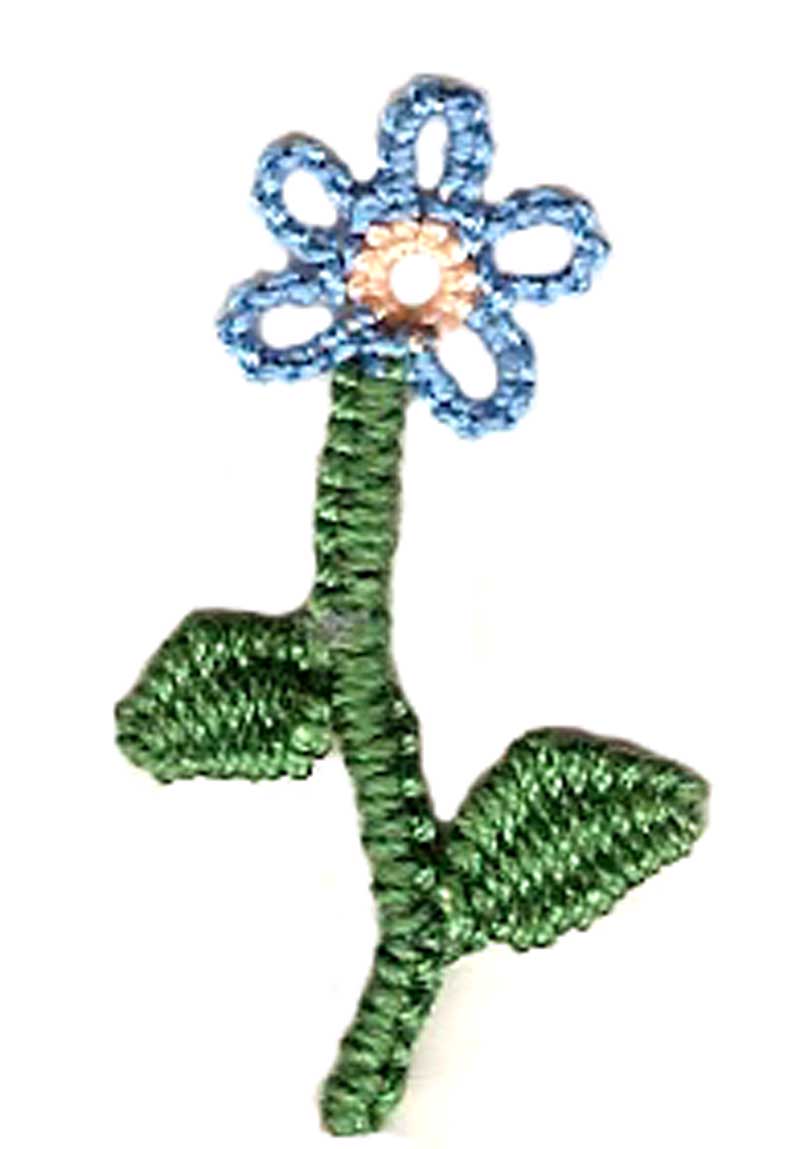
I’m making very simple rings for the blossoms, 4 ds, 8-10 picots with 1 ds between, 4 ds, clr. I’m using a larger hatpin as a picot gauge to make the picots uniform. I usually just eyeball it, but you can see the difference here. Can you tell which one is eyeballed? It only has 4 or 5 picots. They seem bigger somehow. In this particular case, the hatpin gauge works well.
 I always have trouble deciding what to do for the stems. I tried purl tatting on one…didn’t like it. Too bulky for this size card. I used a regular chain with small rings for the leaves in the end. Some have a regular chain ending with a lockstitch chain, which is straighter normally, but not in this case. I pressed all the blossoms but they still tended to curve sharply at the bottom. As long as I get most of the curve out, the rest will ease into the right shape when I glue it. The leaves aren’t going to match each stem exactly. I tried to make them close to what was on the card, but it would take more time than what I have to make it exact.
 After I glue the blossoms on, one by one, I let them dry. I’m just using a string of rings for the mass of green at the bottom but I’m using 2 shades of green, like real foliage, to give the impression of light and shadow and newer & older leaves. Again, it’s not exact, but for someone who is willing to go to that much detail, it’s possible.
The contrast between the print on the card and the tatted pieces shows up more on the scan than in person. It tends to look more blended but in some cases, I’m sure it would be more obvious. I could add a tiny tatted butterfly or a bee charm as well as a tatted edging frame if I had more time, but you can see that even a small amount of tatting makes the card special.


.JPG)


Wonderful Gina and great timing. I am thinking of doing something similar. Thanks for the ideas.
ReplyDeleteThis is marvelous! Thank you for the tutorial. I don't have many people in my life who appreciate this kind of work. I am afraid that if I made a card as exquisite as yours and gave it away, it would end up in the rubbish bin. LOL!
ReplyDeleteEnding up in the trash bin is a risk you take, yes. It's happened. I don't often decorate my cards for that very reason.
ReplyDelete:-) Gina
Thank you for the tutorial, Gina! I might be selfish and tat on cards that I have received and then frame them for myself... pretty decorations for my sewing room! Do you use a special glue?
ReplyDeleteGina...you have been tagged ...you can go to my blog to find out what it is all about.
ReplyDeleteSherry