Showing posts with label bina's cluster motif. Show all posts

Saturday, November 06, 2010

A Post Before Getting Busy!

After looking for lots of holiday ideas the past week, I realized I'm really short on time for many of them. Yep, already!

Here's the vintage motif I tried using clusters on. The original has another round of rings with tiny chains all around the outside framing this part. I decided to stop here for now. I got into my drawing software but it was too late and I have to re-educate myself on it so no diagram for now. Here's the notation:

(3 ds, --) 7x, 3 ds, clr (-- is medium picot, not small)
mock picot to climb to next round
[Ch 3, rw
R 2-1-1-2, clr,rw,
ch 3 + to next p, rw] Repeat around, joining last ch to mp where 1st ch started.
last round
Ch 7-7-7-7, j to base of ch join from prior round all around. On the second p, I made the cluster but you could make a josephine ring or leave it as a picot or put beads there. Your choice. I haven't heard back from Bina yet about showing the cluster technique.

This is the last of my dye play last weekend. It's been hanging above the sink for days, waiting for me to pluck it down! The crochet piece at the top is actually an edging that came from a linen circle that was damaged beyond repair. There are two places in this edging that are damaged too so it has limited use but I love the colors.

The next edging is one I've shown before in its original state. I was intrigued by the crocheted bullions and asked if anyone could come up with a way to tat them. Ruth Perry responded in less than 24 hours with a way! The link to her pdf are not is now working so I can't post them. This edging has some damage too and is not very long so again, limited use.

I am not sure what kind of lace this next one is. It looks woven and I find it often in vintage laces. I was surprised at how well it took the dye because I thought it was a synthetic fiber. Apparently it's natural! I like the way the colors turned out on this too. I wrapped this one around a cardboard cylinder (covered in plastic wrap) and then painted a color down each of three sides.

The last one is a short strip that I was trying the new colors out on: sage green, mink brown, azure blue, oxblood red, deep orange

This one is yards and yards of crochet, beautiful crochet but there is a damaged section in the middle. I couldn't find a way to wrap this successfully so I tried bundling it with rubber bands, like in tie dye. I didn't have the rubber bands all that tight so the dye seeped in. There are a few places that are lighter but the dye reached all of it. I like the color mix but I have no idea what I will do with it. The lace is wide and I'm not sure yet if it is crocheted in rows or in length. If it's in length, I can cut the bad section out but if it's in rows, it will be a challenge to cut and not have the whole thing unravel.

And believe it or not, this is what I would label
FAIL!

It was saturated in color so I don't know why it came out so weak looking unless the thread has polyester in it. I didn't crochet it so I don't know but that would be my guess. It also feels stiff compared to the other laces. I will try to overdye it in the next session with a brown to make it look like faded vintage.

That's it for today!

Friday, November 05, 2010

Someone asked about subscribing to Tatting Times. I have to admit that I often don't include information I've posted before. Maybe many times before. Try a search with a keyword in my search engine to the left and see if you can find the information there first. But without further ado, here's the subscription information:

Tatting Times, P.O. Box 9, Hector NY 14841, USA $16 USA, $17 Canada,$18 everywhere else, in US currency only, published quarterly. You get all 4 issues regardless of when in the year you subscribe.

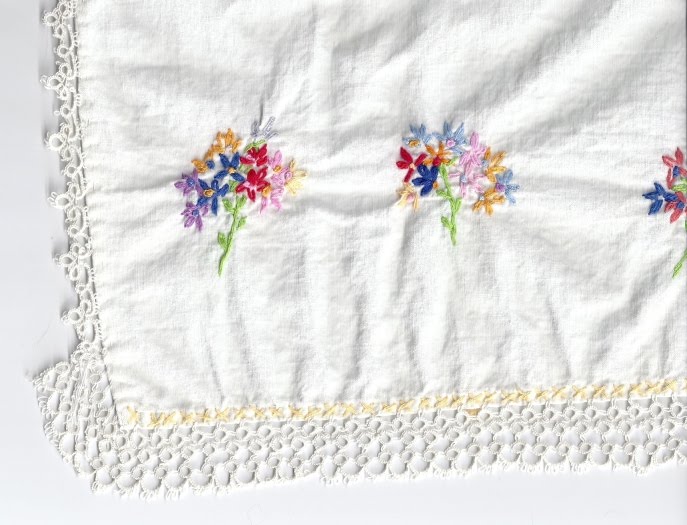
This is part of a cotton runner that I bought somewhere a long time ago. The embroidery is ordinary, even a bit amateurish but the runner itself is in good shape without stains or tears. I bought it because of the tatting but the tatting...is not the best. I don't understand why the ends are different from the sides. The tatting is stitched on, however, and not tatted on. I'm going to remove the tatting and use the runner so make little bags or something. I'm not sure yet. I think I can reuse the tatting on the side to trim the tops of bags but I have no clue what to do with the tatting on the ends. I suppose I could dye them and then find a use for them.

I'm really not even sure I want to use the side tatting on a gift. I'll try pressing it and see what happens or perhaps even wetting and blocking. A good crisp thread doesn't usually fold like this. I have a feeling it's sewing thread. Or maybe just too fine to hold its shape well. I imagine it was very pretty when it was freshly made!

Photobucket


This is my poor attempt at decoupage. I filled in the ridges and circle on the Clover shuttle and then painted the top pink. Only the top. The print came from some Disney napkins on clearance at Walmart. I think it's Cinderella but I'm not sure. I got them for the border which includes this little birdie. I had trouble cutting the side edges off though. I trimmed close with scissors and then used a blade but the paper wanted to roll instead of cut. So my side edges are a little rougher than I would like but given it's a first try, I guess it's not too bad. It's very hard to find tiny prints on napkins. I really dislike the neon green out of all the shuttles so I'm probably going to do this to ALL my green shuttles. Those are the ones I give away when someone needs a shuttle too. I don't care if I get it back. LOL!

Photobucket


Here's that cluster motif completed now. I grabbed something vintage from a book and tried a new version using this cluster. I was emptying a shuttle and ran out of thread at the very end. The center was done poorly anyway so I'll work up a nice version and post it when I'm done.


Tiny doily for a shuttle.


I finally started sewing the monkey clothes! I had hoped to have the pair sent off by now but as long as they get them this month, I'll have fulfilled my promise. I have to make his trousers and then start on the female. So much more to her clothes! I've never used a pattern to dress them before, just using my own and very simple outfits like my grandma used to make but I thought I would try this out. I think they will make a very handsome couple when I'm done!

Wednesday, November 03, 2010

When I finally got home last night, I found Karey's latest publication in the mail:

Included was a very thin bangle, which I honestly prefer to wear than to tat on but it's for tatting. I didn't even get to read the papers enclosed but it's the last issue for the year so I know it's for renewing the subscription and instructions about the bangle. I seem to have a growing collection of these gifts since I never seem to get around to tatting with them, no matter how strong my intentions. I saw a bookmark I may try in the future.

For the past year or so, I've been very interested in combining tatting with other media - you've probably seen some of my efforts with ric rac, macrame cord, and metal objects. Last night I finished this little pansy from a vintage doily pattern:

It's been around a long time and one I always wanted to crochet without doing the whole doily. I used one of my dyed threads. It looks BIG here but it's only about an inch square. My only thought was this would need something in the center if I were to attach it to something. It was easy to crochet, but I'm not likely to make anymore soon. At least now I have a sort of prototype. I was also wanting to get the feel of it and see if any tatting additions might be inspired in the process.

Something else I did last night was continue my skimming of needleart magazines and mixed in the bunch was the Spring 2010 issue of the Bulletin. I tend to skim these very fast when I get them and then maybe...later....I'll read them more thoroughly. Bina Madden of Paradise Treasures is on my blog list but since there's no blog update feed, it never shows at the top. You have to open my list and scroll down to find it. Bina is currently writing the tatting column of the I.O.L.I.Bulletin.

In this issue, I found her article about crocheting clusters within the tatted motif. I have the thread wound...hopefully I can try it out TONIGHT! I'm using variegated but I'll bet a solid might look better. I might have time to do that too and see which works best in appearance. Assuming I get the hang of it. This is the photo in the newsletter by Bina.

I don't know how many people caught the Spulni-Blog yesterday but if you didn't, you really should take a look. This Hungarian tatter has tatted the pieces to create a lace top for a jacket. She showed the tatted pieces in an earlier post and said she had to reconstruct the top to put the lace on. It's STUNNING!

And lastly, I just wanted to show a pattern I picked up at Trader Buck's Flea Market.
I go to this one booth every so often because months ago I happened upon it as the husband and wife were adding to their inventory. There were tons of craft books at only a dime or quarter each. Seems they belonged to her mother and I got the impression the mother had passed on. I mentioned I tatted and she said she would be bringing in some shuttles her mother had. So....I keep going back but no shuttles to be seen. It kind of bothers me in a way that they have devalued her belongings so much. I got this vintage pattern for a quarter. Almost everything of hers is only a quarter. I also picked up several embroidery booklets and transfers that I put on my lace blog. They sell these cheap plastic paintings and bags of socks and t-shirts for more than they sell these vintage treasures. Oh well...their loss, my gain.