Posts
Posts


%2B(650x228).jpg)


Did I mention I broke a lot of those big threads because of my poorly made knots?
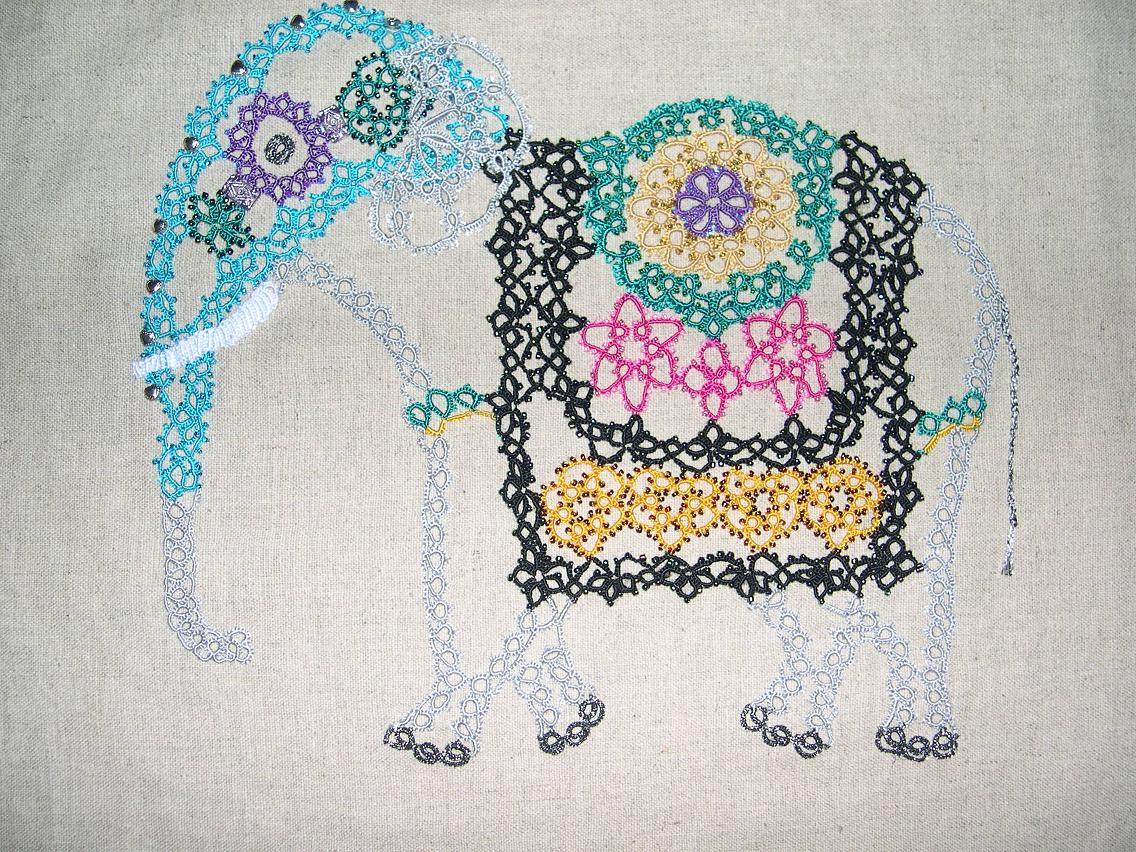
It took me a few years to try embroidery floss out but when I did, I tried it all! This entire elephant was tatted using 2 strands of rayon floss. It adds shine, depth and texture, but rayon is slippery. The newer rayon floss is not so bad. I often use the metallic floss for jewelry, especially earrings, but these days there are other very strong threads that are easier to tat with. A single strand of metallic would break but more than 2 strands was often too heavy for beaded earrings. It does add some sparkle though.
Here is an excellent reference shared by Sheron Goldin for the 2008 online tatting class. It covers everything you want to know about using embroidery floss for tatting.
 Here's a quick visual - I separated the 6 strands of cotton floss, pulling out one strand at a time for the first 3 strands. Then I wound 1 strand on a floss holder and the other 2 on another. The remaining 3 were wound on another. Then I tatted (yes, last night after I said I wouldn't tat anymore!) a sample of each. I wound the shuttle 20 turns which was too much just to show a single ring so I tatted til I ran out of thread on each one. I thought I joined in that gap of rings in the single strand sample but ....that's just another example of how my tatting was going yesterday.
  Here are the samples without the distraction of the floss holders.
 Yes, I've had a much more productive day in tatting! Here's the pear in that same embroidery floss. I'm not sure which partridge looks better in the "seat" of it and I've added the extra element of changing backgrounds.
 At first I wasn't sure that the lighter partridge looked right but now I think so. Wish I'd scanned this set up on white, but I can try that later. The way this one is done, you would almost have to frame it or stitch it down or even glue (gasp!) it down. The directions do not attach it to the partridge but now that I've made it, I think if I make it again, I will attach the pear to the bird.
 Backgrounds are funny. I wanted to tat on this wire with black thread and silver beads but decided I needed a test tat first. I found it looks really striking on a black background too but that was from laying it on top of the scanner.
  Here it is with the scanner's white background. See how much "lighter" in texture it feels? This one is going in the dye bag so you'll probably see it again when I've played more.
I'm also painting wooden snowflake shapes for thread holders. It's only 5:12 p.m.! I suppose I could take a nap too. It's pretty chilly out - just enough to have me dressing warmly inside and looking for things to bake in the oven. I've got beans in the crockpot. What a nice Autumn weekend!


.HEIC)


.JPG)