


%2B(650x228).jpg)


 This is only if you are making one triangle. If you want to bridge to others, you're going to have to use a split ring somewhere or hide a lot of ends.
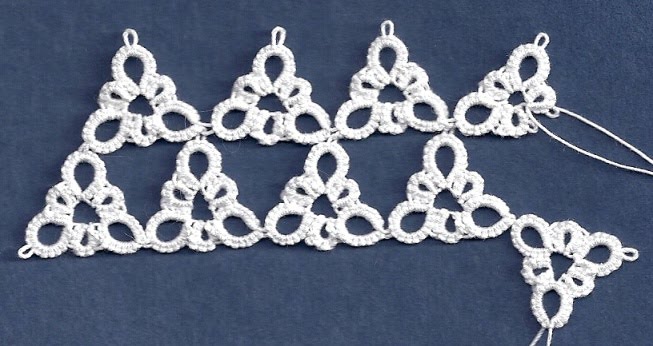 When I was tatting this part, I actually scanned along the way to show how it came together but I'll spare you all the other scans. I'm ending the second line and will join to the motif below when I finish the split ring.
 As I mentioned before, the second and subsequent motifs for a line of triangles will start and end with the split ring and you have to turn the work over to reverse tat ring E before the last split ring.
I will start the next and final ground soon. It's pretty easy and one I'm sure you're all used to tatting at some point. It's the basis for a lot of round motifs.
 I tatted another basket with another size 20 thread and was surprised at how much smaller it seemed. I can see by having them side by side that I tatted the mignonette rings much closer though and the spiral tatted handle is smaller which lends to a smaller look. I'm still having trouble with that left side but I think I've got it figured out. One side involves a split ring and the other doesn't so you have to compensate in the bare thread distance.


.jpeg)


.JPG)


Neat work, Gina!
ReplyDeleteHmmm, reverse tatting . . . one more thing to add to the long list of things I need to learn about tatting. Your baskets are lovely and such a cute idea filled with tatted flowers.
ReplyDelete