Monday, February 25, 2008

Monthly Drawing Correction & Shuttle Answer

Yep, one more angel! This one went to a friend who sent me several tapes that I'm interested in. I used the layered picot for the crown on this one too, but I made the front loops a bit shorter and added beads. I had the beads on my ring shuttle, forgetting this is a chain until it was too late, so the beads didn't exactly go on the way I planned. Where would we be if we didn't have mistakes to learn from? Besides, this is a nice technique in itself and I would have wanted to try it sooner or later.


Comment from Moronez for April 21, 2005 entry:
I just discovered this blog and now you have my curiosity. I would love to try my hand at customizing a shuttle myself and have lots of questions.

What type of shuttle are you using for a base and where do you get it at? What type paints are you using and what do you seal it with? Are they still usable once they are customized?

Love your work.


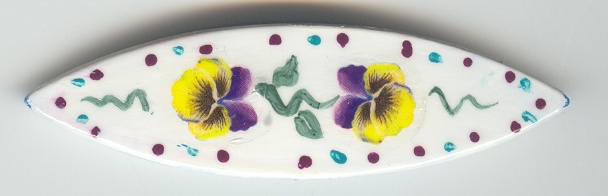
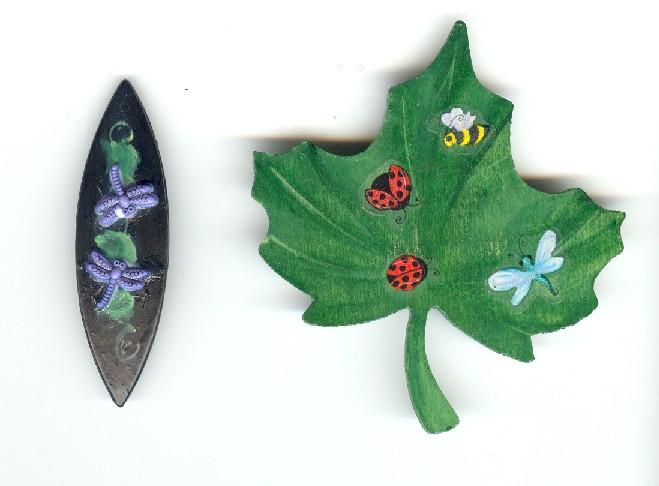
Thank you! There was no address to reply to so I'm answering here. I've used different combinations of paints. This particular shuttle is a generic one that I bought from http://www.lacemakerusa.com/ but I've also painted on aero-type shuttles and have been gifted with dressed-up Clover shuttles. For these, I like to sand them a bit with a very fine grit, just to rough them up so the paint will stick better, and then base-coat them with acrylic. I may have only used nail polish on these but polish tends to chip so I like to use that as the last coat now. This one is a combination of acrylic paint and a decal. Then I seal it with a few coats of clear nail polish which also adds gloss to it. Yes, they are usable. I slide a thin piece of cardboard between the tips to keep them from being painted shut. This one was acrylic paints with a couple of dragonfly buttons with the posts cut off and this one was simply painted with acrylics. That faded red spot is a mistake which hopefully showed up a lot more on the scan than the actual shuttle. I also use several coats of nail polish with glitter sometimes or for the metallic look. I love painting them and hope to do some more soon!

Change in Monthly Drawing - You only need to enter once! I'll keep the entries from month to month until the year is out. The winners won't be returned to the pot. If you change your email address however, you will need to email me again and tell me.

Isn't this fun????

Sunday, February 24, 2008

Special Notice - Anniversary Celebration All Year Long!!!

As I posted earlier, I celebrated five years of blogging about tatting on February 13, 2008. I wanted to do something special but I was crunched for time in a lot of ways. I wanted to create a slide show highlighting those years and couldn’t find my 2006 photo disk at the time. I found it today but it will take hours to put it together so don’t hold your breath – it will show up eventually.

I’ve met and interacted with so many people over the years. I feel bad sometimes because I don’t remember names like I used to. I see at least 500-600 people on campus, one-on-one, each year and I can’t remember their names either. I have a good memory, but not as good as it used to be. At one time, I could have told you what you were wearing when I met you, what was going on in your life if you told me, and what the weather was like. I just can’t do that anymore…and frankly, it’s not important. It’s not that I completely forget you; I just forget your name. Remind me with a few clues and it all comes back.

The slideshow isn’t the only thing I wanted to do. That’s more for me, to remind me of everything I’ve tatted because the majority of it is gone now, and like names, I forget them. I also wanted to recognize all the people who have helped me become the tatter that I am today. I’ve said it many times – I’m not sure I would have pursued tatting beyond simple edgings and bookmarks if it hadn’t been for the internet. Seeing the potential of tatting and meeting so many creative and talented people was a significant milestone in my creative life. It is my intention to focus on at least one of those influential people each month for the next year.

The other thing I want to do is recognize and appreciate each of you. How can I do that? I don’t know of any way to reach each and every single one of you but I do want to offer the opportunity for me to share with you individually. So each month until the next anniversary, I will also have a drawing and one person will receive some kind of goodie bag from me. The drawing will be on the 13th of each month. To enter the drawing, simply email me at ginab6@yahoo.com. Put “monthly Tatting Goddess drawing” in the subject line. This is open to anyone who tats anywhere in the world. It would be helpful to me if you could add a few tidbits about yourself, your mailing address of course - or you can wait and see if you’re the one drawn before giving me your address, what you like to tat, your favorite colors, threads, patterns – anything you want to tell me about yourself.

I am SO looking forward to making something for the winner each month! So don’t be shy – sign up every month! Unless you win….that would just be greedy to be the winner every other month. LOL! I’ll post a reminder now and then and I’ll also announce the winner each month.

:-) Gina
Nata #67

The Sherbert Angels

You might remember from my last post that the vintage edging I tatted recently had me thinking of angels and I did have a go at creating one from that design, but it faltered and because I wanted to get an angel done now for a project, I left it for another time. I have another angel in the wings too...it's been there for a few years now, ever since the angel round robin. In fact, I can remember when I started it - on my first trip to FL to visit my cousin in March, 2002. It's still in my notebook, along with the reindeer.

So I fell back on a favorite, two favorites in fact. Both are designs by Martha Ess. Mark Myers has some angels I particularly like too, in his Tatted Gathering of Angels. I like to use the tiny angels in his Angel Jewelry Set to give away in cards or tiny frames, especially as a momento for someone who has passed on. I wanted something a little bigger this time though.

So this is Martha's variation of a pattern by Brigit Phelps which I think I posted about here and on Dec. 10,2007 both. Since I was using the glass heart and it seemed to take up more space than beads had previously, I made the skirt longer by adding a few repeats of the chain/picot sequence. This one is tatted in Sherry Pence's Rainbow Sherbert, size 20. The thread appeared out of nowhere - I think on my computer desk - so I thought it was time to try it out. I'm not sure where I have Marilee's thread but I have several bags of thread here and there that I need to put away and it's in there somewhere. It will appear "out of nowhere" when the project is right, I'm sure. LOL!

I also tried something a little different for the head. I made long picots and then threaded beads on before joining at the next spot where a picot would be, making another long picot right after that. It ended up looking like I had just used 3 beads in the picot. I'm not sure what I had in mind now but it was a little different effect than what I ended up with. I still like it.

The next pattern is also a Martha creation but this one is an original, named Marjorie's Angel. My copy was from the round robin printouts but Martha has it on her webpage now. I made a few slight changes here too. One inadvertantly - the rings at the tip of the wings have 4 picots when they are supposed to have 3. I saw my mistake when I got to the second wingtip and decided to make them match. I also decided to substitute fluffy (also known as ruffled or layerd) picots for the split ring halo. You can't really see it very well in the scan but there is a double layer of picots. These kind of decorative picots are made by measuring the length of your picot, making 2 first halves of the ds, measuring another length, and making 2 second halves of the ds, and you continue alternating the 2 first and second halves. You can play with them in other ways too, by making one side longer than the other or by adding beads to one or both sides. Ah...just got an idea for another angel crown. I wasn't going to make another one but I might have to now.

This thread is Flora size 20 and I'm not sure what the color number is but it always reminded me of orange sherbert so that's why I called these the Sherbert Angels.

Saturday, February 23, 2008

#21 - #25 of 25 Motif Challenge

And I'm done!!!!

The very last one is my favorite. I'll probably do that one again. #21 repeated one segment in the instructions...it was a repeat, then said to join and then repeated the line again. LOL! I had nearly filled my shuttles so #22 and #23 were from the same thread, Aida size 20 for the brown and DMC Cebelia size 20 for the gold. You can see where I used a split ring to climb out on #22. It was late at night and I kept thinking I really should go find the directions for a single shuttle split ring. I didn't know how I was going to get the ball thread up where I needed it - but I think now that I simply would have encapsulated it. It was a fiddly motif. The outer round does not join at all. You think the small rings join at first glance but they don't. #23 left out 4 ds at the first ring of the second clover. I corrected that ring but then made a mistake on the third ring which I corrected on the later clovers. #24 was fun to do in two colors but remembering my 2-color split ring in #22, I decided to cut & tie and hide my ends instead. And then the last one, #25 tatted up so nicely. No problems with the instructions and I really like how it looks.

This book also has 6 very simple edgings and 2 crosses. One of the crosses reminds me of one in Workbasket which I tatted for a very early exchange. Perhaps she designed that one also. There are also photographs and written instructions on how to tat at the beginning.

So what am I going to do with all these motifs? Halfway through, I got to thinking that I should have done them all in the same thread. I'll have to think about a way to preserve them now. I don't want to just stick them in an album somewhere.

Now I can get to an angel. Jane's angel postings have got me inspired. That vintage edging I did awhile back keeps saying "angel, angel" to me. We'll see if I can manifest the image that is in my head.

Monday, February 18, 2008

25 Motif Challenge - #17,#18,#19, #20


I didn't feel quite up to speed yesterday, very tired and a headache off and on so I didn't do much. Napped and tatted. I'm missing the CD with photos from 2006 so I haven't gotten any further with the slide show. No matter...we'll just celebrate til I'm done celebrating. LOL!

The above four motifs moved along quickly. There weren't really any discrepencies in these and I had to wonder if more than one person wrote up the patterns. I used split chains and split rings where I could so that would automatically change the instructions but there was nothing wrong with them as they were. One might have had a picot missing. Maybe I'm getting used to no reference to joining rings at the side - can't really remember and I don't have the book with me right now. I remember that I only made one note though. There is still the sequence of 2-2-2-2 for tiny rings. LOL! #18 and and #20 are a break from the usual designs. She has most of these ending at a place where you can leave a loop for hanging. That's why #18 started with a chain, so that it ended where the chains joined instead of at the base of the clover. I chose to start with the clover and ended at the base of the clover but it looks the same - without the hanging loop. #19 was tricky because there was a tiny split ch 1-1 between rings to end with. It was so fiddly I kind of fudged. Oh - that's where the discrepency was! The instructions said to chain 1 ds, 1 1/2 ds, and then go to the ring and repeat around. What is 1 1/2 ds? I would take it to be 1 ds and then the 1st half of another but looking at the photo, there was a picot right in the center. The instructions didn't mention a picot. So I made it up, ds,p,ds,rw.

In the meantime, I think I'm trying to do too much. I'm gathering information to apply for my ASP. I have to do it NOW if I want to apply for a grant from work to fund part of it. Also gathering information to connect with several realtors and make a choice of who I want to work with (WHEN????? - where will I find time!!!) I still haven't done my taxes. I have 2 conferences to attend - one in Indy next week and in Columbus, OH the following week.

So....things may be sketchy here for awhile.

Wednesday, February 13, 2008

FIVE YEARS OLD!!!!!

My very first post! Tatting - that delicate wispy threading of air pockets that makes an enduring lace. It's become an obession with me - more than crocheting was, more than quilting, more than even painting - only because it was more portable.

When I started a blog, the freebie version didn't offer much. I was initially inspired to start blogging after reading my friend Tim's blog. Tim now has his own website but he had been writing in a blog for a year or so when I met him. We helped each other out learning how to use photos - finding a free server to host the photos and upload from there. He taught me how to do the html for links. On March 11,2003, I was still struggling but managed to upload a scan of the alligator I tatted and a paisley heart that I tatted for an exchange. I didn't have a scanner and had to go to my sister's house and use hers, save it on a disk, and then come home and upload it to the online server location. If you were to read from the beginning of this blog, you would see how I learned step by step. Many of my photos are missing now because I no longer use the free online server. Much has changed over the years.

Google bought Blogger and suddenly, what I'd been paying for became free. They added automatic html and editing capabilities. They made adding graphics easy. OH how easy it is now!

I thought I could get a slideshow made highlighting the past five years but it's after 9:00 p.m. and I have 2 more years to go.....so it will wait.

Can you believe no pics at all?????? Just like the first entry.

But I have to tell you....I've loved every minute of this blog and every person I've met through tatting and every book and every thread and every bead and every shuttle and every pattern. The slide show will be great and worth waiting for.

Happy Tatting!

Tuesday, February 12, 2008

I wanted to tat a bookmark for my daughter-in-law to-be whose birthday was last week. I only found out that day! I got her something else too, but this was to tuck in the card. I started with Sue Fuller's Heart's Desire heart, but I used a printout from the online class that I printed out a long time ago. It only gives directions for the first half of the heart. LOL! I kept thinking, "I don't remember it being this complicated." I had to reverse everything in the directions....sigh....THEN I pull out Sue's book and see she had it all written out there. I knew I didn't have to figure it all out before! I used size 50 Flora and when I blocked it, I was sure it was going to look terrible and out of proportion so as it was drying, I tatted Sue's smaller heart in the book which goes very quickly. I decided to go with it for the bookmark and continued on with a set-stitch or node-stitch tail and added a dimpled ring heart at the end of the tail. It turned out better than I thought it would. It doesn't look all that heart shaped from this angle, but that's ok. I love the shape for a bookmark. I also love the red heart.....not sure what I'll do with it yet. The smaller heart is tatted with Olympus, size 40, color M8 - whatever that means.

This is a vintage edging from a Needlecraft magazine that I also tatted last night. Well...it's a sample. I was trying out the pattern and emptying a shuttle so this is as far as I got before I was out of thread. I really like the way this looks and hope to tat one to attach to a linen circle...or square....or oval...pattern to come when I have more time.

And this is what I've been knitting. I cleaned out a tub of yarn last week when my sister and daughter were here. I was still left with lots of "fuzzy" yarn so I thought I'd start knitting it up. I was trying out a stitch (yeah - I like to test those stitch patterns) and have in mind a cowl or mobius type thing but I may run out of yarn. Only 1 skein of this one. If that's the case, I'll rip it out and make a hat. LOL! It's okay....it's not an effort going to waste. I'm getting a feel for the yarn and needles and learning lots.

Monday, February 11, 2008

#12-#16 of 25 Motif Challenge

It's a good thing I'm doing this as a challenge because I'm bored already and would probably stop at this point if I hadn't committed myself. Some motifs are very similar, such as #11 and #12. I think the only difference between the two is that #12 doesn't have as many picots on the chain segments of the inner round. I used a split chain to climb out to the outer round. The author likes to use those little rings of 2-2-2-2 a lot. I'm not too fond of them myself. After the first chain, she says to "tighten rings" but I'm sure she meant to snug up the chain. In #13, as with many of the motifs, no mention is made of where to join more than once. For instance, there is no mention of which picots to join to when tatting the outer round. If you didn't have the photo to refer to, you wouldn't know.

In #14, nothing is said at all about joining the center rings but it was clear in the photo that they were joined at the side picots. Maybe it was just assumed that you knew where to join, but I would not assume that a beginner would know that. However, there are 7 edgings at the beginning of this book and she does instruct where to join in those - so maybe it was a valid assumption from her point of view. I believe I made the last chain on the inner round of #14 a split chain (only 2 stitches) and then the final ring was a split ring to climb out to the next round. On #15, this one also had a split chain at the end of the round and before the last ring. It was tricky because it faced inward and I had to do some manipulations to keep the chain correctly positioned. You can tell it does not want to lay as smoothly as the others. #16 used measured picots. This was the last one I tatted last night and it looks like I might have blocked it a little better. I reshaped it with my fingers after I had already scanned it and it looks more even now.

I got the pendant I ordered from Irish Molly! I wanted to see the technique up closer. I really wanted the Victorian Pendant too but decided to hold off on that one until later.

In 2 days I celebrate my 5-Year-Anniversary for this blog. I wanted to do something special but it's creeped up on me faster than I expected....so we'll see if I can come up with something or not.

Wednesday, February 06, 2008

#10 & #11 for 25 motif challenge


I actually tatted #10 after #11 because I wanted a little time to figure out how to make those bridges from one round to another. The only thing I did differently was to make a mock picot at the end of the center ring instead of a cut & tie. The instructions leave out a segment of 7 ds, p in the outer round and do not mention joining at the sides at all. So if one were to follow the instructions only, they would get an outer round of chain arches with 2 picots. For #11, the instructions were good. I climbed out of the center with a split chain and I also used 2 shuttles so my "points" on the outer round are more arched than pointy. If you do the shoelace trick for the rings off of the chains, the chain segment is more angled than rounded. She uses 7 rings for the center of this one and several other motifs. I thought that was a little odd as most motifs are made up of even numbers - either 4, 6 or 8 rings - maybe up to 12 for a larger wheel.

Patsy Goodman recently suggested making sure you measure all 4 sides of a hanky you are considering embellishing with tatting to make sure they are the same length - especially if you are tatting corners into the edging. I suspect that might be especially true if you've prewashed a new one. Fabric can be pulled out of shape just like tatting, so "blocking" by pressing it or pinning it within lines might be a good idea.

Piecework is currently hosting their Pincushion contest with a prize of $500 cash! You can get the rules and entry form here. Deadline is March 1. While you are at the first link in this paragraph, check out contest winners from the past!

Last night I bought a pendant on Etsy - made of polymer clay with flowers on it in a way I haven't see before. I can't wait to get it.

Tuesday, February 05, 2008

#8 & #9 for 25 Motif Challenge


I don't want to complain too much about this book and yet, I do feel like I should point out the errors for those who want to make the motifs themselves. I don't have my copy with me so I can't be too detailed but I know some picots were missing in #8. It did give measurements for the long picots that are joined on the long sides but never any explanation about joining. Fortunately, there are photo examples of each motif.

For #9, I tatted a split chain and a split ring to climb out of the center. The rest went quickly and it blocked out beautifully.

Here is the edging to go with the medallion from the last entry. Although I have 2 shuttles used in the instructions, I tatted this with a ball and shuttle and did the shoelace trick for the small rings that are thrown off the chain. This is size 20 Aida thread and I had the shuttle full, tatting it empty. There are no directions for a corner but you can lay a mirror against the area you want to make a corner and figure out how to adapt the pattern. I'd love to do this in a smaller thread now.

2 shuttles, CTM (continuous thread method of winding)
R ring Ch chain - picot
clr close ring
rw reverse work
+ join

[R 5-3-3-5, clr, rw
Ch 5 ds
Small R w/ch shuttle 5-5, clr
Ch 5, rw
R 5+ to last p on 1st r, 3-3-5, clr, rw
Ch 8, rw
R (clover) 5+ to last p of prev r, 3-3-3-3-5, clr (4 p showing)
R 5+ to last p of prev r, 3-3-3-3-3-3-5, clr (6 p showing)
R 5+ to last p of prev r, 3-3-3-3-5, clr, rw (4 p showing
Ch 8, rw
R 5+ to last p on prev r, 3-3-5, clr, rw
Ch 5
Small R w/ch shuttle 5+ to prev small ring, 5, clr
Ch 5, rw
R 5+ to last p on prev r, 3-3-5, clr, rw
Ch 6-6, rw]

Repeat [] for desired length except join 1st picot of 1st r to last p of last r prior to ch 6-6

Saturday, February 02, 2008


I'm guilty of this. LOL! Not of going to the library and filling out the cards but I do fill out cards for the free issue and then don't subscribe. It's not too often that I'm so impressed that I want to subscribe. I've found some really good deals in the past year where I was only paying $10-$12 for a year but unfortunately, I don't have time to read them like I used to. I subscribed to Piecework recently - apparently - since I got an invoice. I know I did but I can't remember what prompted me to do that. In the meantime, another magazine I ordered has not arrived yet. I don't pay until I see it. I've let the $10 ones expire. I'm 6 months behind in reading them. Of course, the ones I really like are expensive. I enjoy Threads magazine. I only like about every 4th issue of Piecework...I think that's why I let my subscription expire years ago.

Too bad there's not a tatting one. There are enough new designers and "books" coming out that I'm sure it could be supported. Too bad I'm not in that business.

Third Annual Bloggers Poetry Reading for the Feast of St. Brigid (also known as Groundhog Day). Well, I'm too late for this unless I make up a poem before I publish, but I did enjoy the one in the link that managed to include some needlearts within it!

My threads, they spoke
with quivering hope
That soon they would be tatted
with beads and things
of chains and rings
elegantly framed and matted.

How's that for impromptu?


I finished my documentation for the Hector class. Here are a couple of samples if you are interested.


"Tatting Magic and Mystery" - our annual Tatting Seminars in Hector - is happening April 5 & 6. We're really excited because it's our 10th anniversary and after a lot of planning and begging and work, our program is stellar! If you would like information, sent as an email attachment, please email me off-list. We know not everyone will be able to come, but even if you can be with us only in spirit, we'll have a way for you to participate if you like. More details soon on that...( Karey Solomon )


I'll post contact information as it becomes available. In the meantime, put April 5th & 6th on your calendar! If you need Karey's email, contact me privately at ginab6 at yahoo dot com.

Here is a "dainty medallion" from August, 1925 Needlecraft magazine. It's pretty simple and there is an edging that goes with it that I will try to post tomorrow.


2 shuttles, CTM (continuous thread method of winding)
R ring Ch chain - picot
clr close ring
rw reverse work
+ join

R 5-3-3-5, clr, rw
Ch 5 ds
Small R w/ch shuttle 5-5, clr
Ch 5, rw
R 5+ to last p on 1st r, 3-3-5, clr, rw
Ch 8, rw
R (clover) 5+ to last p of prev r, 3-3-3-3-5, clr (4 p showing)
R 5+ to last p of prev r, 3-3-3-3-3-3-5, clr (6 p showing)
R 5+ to last p of prev r, 3-3-3-3-5, clr, rw (4 p showing
Ch 8, rw
R 5+ to last p on prev r, 3-3-5, clr, rw
Ch 5
Small R w/ch shuttle 5+ to prev small ring, 5, clr
Ch 5, rw
R 5+ to last p on prev r, 3-3-5, clr
Ch 6-6
R 5-3-3-5, clr, rw
Ch 5
Small R w/ch shuttle 5+ to prev small ring, 5, clr
Ch 5, rw
R 5+ to last p on prev r, 3-3-5, clr, rw
Ch 8, rw
R (clover) 5+ to last p of prev r, 3-3-3-3-5, clr (4 p showing)
R 5+ to last p of prev r, 3-3-3-3-3-3-5, clr (6 p showing)
R 5+ to last p of prev r, 3-3-3-3-5, clr, rw (4 p showing)
Ch 8, rw
R 5+ to last p on prev r, 3-3-5, clr, rw
Ch 5
Small R w/ch shuttle 5+ to prev small ring, 5, clr
Ch 5, rw
R 5+ to last p on prev r, 3-3-5, clr, rw
Ch 6-6, + to base of 1st r
secure and hide ends

Tuesday, January 29, 2008


Last Night blogger was down and I didn't really have much time anyway. I didn't sleep well the night before and I went to the gym after work so I was dog-tired. I bought this fabric one night last week thinking it would make a great bag. I have tons of patterns for bags and haven't made the first one. The pattern I'm thinking of has a focal point with a medallion on it. I haven't really figured out how I'm going to do this. I really wanted a paisley shaped motif and I've printed off the one from Dan Tribble's site. It's the 2nd link for an 1874 German pattern. It's actually tatting with tape lace but I want to figure out a way to do it all in tatting.

In the meantime, I tatted this square motif from the Japanese book, Tatting, by Yusai Shokoin. I think I've tatted it before - I like it so well. I didn't hide the ends because I can use the thread to sew it to the fabric....if I use it on this fabric. It's a bit tricky to tat. There is only the diagram since I can't read Japanese and it doesn't really show where to start. It looks like you make the center 4 rings, but if you climb out of those rings to the next round, you climb out into a chain. It can be done, but I don't like to do that if I can help it. So then I figured out you start with the second round and throw the center rings off of the chains. It still ends in an awkward place and you have to cut & tie and start a new round. Every join from the 2nd to the 3rd round is at a chain so even if I could figure out a way to end elsewhere on the 2nd round, it's going to be an awkward climb out onto a chain. Sometimes it's just as well to cut & tie. In this case, since I was planning on sewing it to fabric, I didn't have to worry about hiding ends anyway.

What I really need to do is write up my pattern for Hector. I'm sure Karey is tapping her toe and pursing her lips....maybe I should go do that RIGHT NOW!

Saturday, January 26, 2008

3 more for 25 Motif Challenge


Isn't this a beautiful shuttle? It's described as a madras knotting shuttle in Needlework Antiques and the information about is says:
"The condition of this rare shuttle is very good. It is solid and tight and there are no knicks or chips in the bone" but ends are open. It is also $365. For that much money, I need a pedigree with it.

I followed an alert from google about a tatting reference and in the same newspaper, I found the perfect tatter's event - The Chocolate Affair!

A Chocolate Affair is Ballet Des Moines’ social event of the year that is held in conjunction with the merchants of the East Village.

Start at 5:00 pm by touring the East Village merchants for chocolate tastings at every host location. Then, at 7:00 pm join the ballet at 504 East Locust for a “hot” chocolate party. Chocolate martinis, a cash bar, great hors d’oeurves, and salsa dancing provided by Salsa Iowa.

Friday February 1, 2008

5-8 PM Chocolate sampling in the East Village

7-? PM Party in the Ballet Des Moines Building at 504 East Locust


I started tatting the last of Jane's TIAS ( and my hippo OR rhino guess was good!) but when I got to the eye...my thread snarled at me when I tried to bead it. It thought I was beating it, not beading...and it frayed eventually and broke. I know this will shock some, but I'm not going to fix it and finish. LOL! I've been unhappy with my tatting of the first three motifs anyway and I rarely tat animals for myself so it's not a loss to me to not finish it. It WAS fun however!

Last night I made 3 more motifs for the 25 motif challenge. I'm really glad I'm doing this. I would never recommend this book for a beginner now. The instructions have too many mistakes. I corrected as I tatted, but...I'm only on motif #7. That's not a good sign!

Motif #5 has a picot left out of the ring that is thrown off the chain. The points in the book are sharper then mine blocked out because I used 2 shuttles and used the ball shuttle for the rings while the designer used the ring shuttle - although it does not say exactly how it was done, I'm sure that's how it was tatted.

For #6 I tried to make a long mock picot and and start my chain from there instead of starting a whole new round. Then I made a split chain at the end of that round to climb out to the final round, making a split ring to start it off. My split chain is obvious because it's a bit bigger and more pointy than the others in that round. I retatted it twice, trying to get it smaller and more in line with the other chains. The outer chains are to have 5 picots but one chain in the book photograph has 6 picots. LOL!

There were several mistakes in motif #7. There are 4 picots instructed in the first ring but none of them should have more than 3 picots. There is a clover (3 rings) at the top and the remainder of rings are in pairs but when you read the instructions, it states to make a pair of rings and then chain and then ring. THEN it says to make 3 rings together....so you would have a single ring plus 3 rings....and it says to continue for 7 sets of rings but you actually have 1 clover and 6 pairs of rings with the chain between each ring segment. There are 7 segments of rings altogether though.

I worked out at the gym this morning...seemed like a nice gentle workout...but I'm off for a nap now!

Thursday, January 24, 2008

I didn't know crocheted lace could be made by machine but it appears that there is a machine in China for that purpose. I couldn't find out any more about it but it can make 700 yards in 24 hours of 12 cm width...depending on the material it is made out of along with a few other factors.

There's a brand new issue of CQMagOnline!

Here's the lastest rendition of Jane's TIAS. I should have done some warm-up tatting with this thread before I started the critter here. I think it's safe to assume it is some sort of animal critter. It's easier to tat with this thread now that I've handled it some.

My thumbtips are cracking since it's so dry around here. I've boiled tons of water and used lotion after lotion but it would be nice if it warmed up so the furnace didn't run all the time and dry the air so. I believe it's to get up around 40º at the weekend but right now it is 0ºF. I'll tape up my thumbs after putting some antibiotic ointment on them and that will do wonders overnight. My lips are beginning to get very dry too. Plenty of water going in....and going out about as fast! I was trying to work on my project for Hector tonight but my thumbs were getting unhappy so I decided to call it a night.

Tuesday, January 22, 2008

2,3, & 4 for 25 motif challenge


Here's motifs #2, #3, & #4 for the 25 motif challenge, same order as in the book. I broke the picot on #2 as I was hiding the end. And the next motif I tried with skinny thread also broke in the process so I went to a bigger thread for #3 & #4. It was beginning to irritate me. LOL! It seems #2 was also some thread I dyed because it bled all over the place when I blocked it and didn't look nearly as vibrant as it did before it got wet. #3 was thread that was already on a shuttle. #4 just said to me that it would look fabulous in white and not to argue.

Anyone else have talking thread that screams and shouts, "Use me, Use me!!!"? Maybe you have squabbling beads -"I'm bigger; I'm tinier; I'm more sparkling; I'm more expensive; I'm the most economical; I'm the only one that matches the thread." Or the shuttles, do yours whisper your name in your ear in the middle of the night if they aren't being used enough? Do they haunt you in your dreams with knots and snarls and split, frayed fibers?

If so, then you are truly an infected tatter. There is no cure. Books will jump into your hands at vendors' booths. Patterns will pop up on your monitor repeatedly until you have no choice but to print them. If you try to sweat it out, I warn you, you will end up curled in the fetal position with shuttles wound up in your hair and tatting needles skewered through your toes.

You might as well not fight it and die happy with yards and yards of tatted lace surrounding you, don't you think?

Sunday, January 20, 2008

Joining the 25 Motif Challenge and so much more

There is a film on Jan Stawasz's website which features not only his tatting but his instructions. Jan incorporates frontside/backside tatting in his designs, which I don't do and yes, it does make it hard for me to read his diagrams, but I manage. They're so beautiful.

I'm very unhappy with the knitted mitten. It turned out huge! I haven't done the finger flap yet and have decided I will rip it out and start over. I think I will go back to the first pattern I used.

There were a few more finds during my bargain shopping Friday. I found this wooden teapot box for $1.00. Perfect for storing some teabags or other tea paraphanelia in - sweetener or tea caddys, etc.
Opened up, it's about 3 1/2 inches square. Years ago, when I was a very young bride in her first owned home, I wanted a blue onion theme in my kitchen. I never got it before we sold the house, but over the years, blue onion stuff keeps showing up. This is not the blue onion motif but it would blend in well. I do have a tea-for-one with a blue onion design. Even so, I wouldn't mind painting this a different color.

I got this vase for 75¢. Not a very big opening but it will work for a few stunning blossoms, fresh or tatted. I might have to try out those pansy designs I keep seeing. I have yet to see a tatted pansy that I loved. There are some I like, but I'm not dying to make them. Maybe I should come up with one of my own. I used to paint pansies all the time so the way I visualize them is not how I've seen them tatted.

No response from anyone about the 100,000th visitor. Ah well...it is hard to capture that.

Here's the rescued doily after 2 days of soaking. I rinsed it and then laid it on the blocking board but didn't pin it. Looks much nicer, doesn't it? but there are still some rust stains on the back side. This is topside.

On the backside, I've laid a letter opener along a line of the rust spots. You can see there are more. I do have some stuff that takes rust stains out and I may try that next. I haven't really had time to tackle that today. It measures a little over 10 inches (25.4 cm) and has the tinest picots. Once I get the rust stains out and block it again, I may try to define the picots more, but I rather like it this way too. Does anyone recognize this specific pattern?


I decided to join the 25 motif challenge. I knew I made more than 25 motifs in a year so hadn't thought about joining before but today I was thinking how I've never gone through a tatting book from beginning to end, reading it let alone tatting it. It just happened that the book I had in hand was Tatting for Beginners which has 25 motifs in it. It occured to me that joining the challenge would be one way to motivate me to go through the entire book. I've made maybe 4 or 5 motifs from the book at one time or another.

So...motif #1 from the book...I'm pretty sure I've done this one before but for some reason did not write in the corrections. The author has it written as 2 separate rounds but I decided to climb out of the first ring with a long mock picot and split ring. The count on the larger rings was wrong and I just guessed at what it should be. It's given as 4 ds, p with 2 ds between each (no number of picots named) 5ds, clr. From the photo, I can tell it's 5 picots, so I think the ending 5 ds should be 4 ds as it is in the beginning. I wonder how many beginners have been frustrated by the very first motif?
This wasn't going well for ME at all. I couldn't figure out if the bare thread was too long or the large outer rings too small or what but it was definitely cupping. It makes a nice hat for a ball of size 70 thread. Seriously, maybe this is why I've not used this book much. I read in the beginning that the author passed away in 1988, before common usage of split rings and split chains. I hope if they ever reprint this book they will correct the errors in stitch counts. The designs are too lovely not to.

So here's the second draft of my first motif. I made the center picots shorter and the length between rings shorter. I used a thread I dyed a few years ago and it's probably size 70 or 80. "Noo" used size 40 so it stands to reason that with a smaller thread, I should make the lengths shorter. This one did lay flat. I really don't like this kind of motif. It's next to impossible for me to get all those rings perfectly uniform in size.


And last but not least of this very long post - Day 7 of Jane Eborall's TIAS. Somehow I missed a day. I thought today was the day she wasn't going to send out a reminder but it must have been yesterday. Anyway...I tatted that up this morning. I ventured a guess to her by email of what it will be.

Friday, January 18, 2008

Apparently I am not getting enough tatting time in. I was up way past my bedtime last night working this earring from Judith Connors' book, Contemporary Tatting, to help a new tatter understand how to join those beads at the bottom. There is more to the earring but I haven't gotten to that part yet. I kept thinking, "this won't take long...". You know how that goes. To begin with, I couldn't find the plastic rings even though I know I have repeatedly moved a package several times over the past few weeks. I ended up finding some in another location. Then....I had to string beads and wind a shuttle....then I tatted and scanned and tatted and scanned..... I simply could NOT stop myself!

Then this morning, I saw that Jane had posted day 5 on TIAS. I tatted it before I went to work, maybe even before I took my shower - I don't remember now. Not only did I tat it, I scanned it and uploaded it here.


During my lunch hour, I visited Trinity Mission. I couldn't believe it - I found this tatted doily marked at only a quarter! I tried not to take it personal but it's kind of hard not to get a bit miffed that it was valued so little. But...you can't really see it too well here...it is really stained badly. I have it soaking in OxyClean right now. There are some rust stains on one side that aren't coming out. I have a few more tricks up my sleeve but if they don't come out, it will be a good excuse to try painting dye on it. I will find a way to salvage it somehow.

I also rescued this little finger towel or whatever it is. Looks brand new and never used or even washed. No fiber content tags though. It was only 10¢. I love making sachets and little pillows and bags out of linens like this.


See this little bit of crochet that is in the center? I wonder if it was purchasd that way or added later? I've never seen that added touch on one of these before.

I just discovered a bit ago that I have jury duty on February 5th. This is my very first time being summoned in all these years that I've been a registered voter.

Tonight was my first gym workout. I am definitely on a kick to lose weight before my son's wedding in October!

And....I got some Due South DVD's I ordered today so I'm off to watch Paul Grosso and finish knitting a mitten.

Thursday, January 17, 2008

Done! Whoops - why's that one chain guy peeking up higher than anyone else? LOL! I enjoyed tatting this one. The tiny rings on the outside were 7 ds - I couldn't see the picture well enough in that part to see if they were josephine knots so I just went with tiny rings. That's probably the only element of the design that I don't like and might leave off in future attempts. I'd like to do it again in a solid color and also try some other color combinations.


I scanned it with different colored backgrounds to see the visual effect. I liked the white and the dark blue best. The motif has a stronger contrast quality there. With the buff and the pale green...the yellow tends to sink into it and is not as strong.

This is one of the seldom discussed elements of tatting. Have you ever seen a pattern worked by somene else that you would not have touched and found it incredibly beautiful because they used a thread or a color or color combination that was vastly different from the original and it made the design just pop out at you? Or the opposite - a beautiful pattern done in a horrible color or type of thread and poorly blocked or tatted? We've all made those mistakes. You think a thread will be perfect and then you start tatting....and then you think, well, if I just get past this part, maybe it will all come together...or probably when I block it, it will work out.....

Sometimes they do...and sometimes they are things you should just quietly dispose of accidently. LOL! I am particularly susceptible to variegateds. They look so beautiful on the ball or the skein! But if you pick the wrong design.....it's butt-ugly! A waste of a beautiful thread,time and an otherwise perfect design. I think that's why I keep holding off tatting the 2 beautiful hand-dyed threads I've purchased. I don't want to waste them!

I sometimes wonder if designers cringe at the way some of their designs are tatted up? I think they are more often very pleased by the results but there are those moments when they aren't.

I ran across a blog one time which focused on really bad design - I think it was knitting. They featured the original picture, not what someone had knitted up. I didn't agree with all of their choices - which just goes to show you it is largely subjective. In the same way some people like very small tidy picots, others like long loose wavy ones. To a certain extent, it's about individual tastes and I would never tell someone they had bad taste. LOL! Oh - I found it but be forewarned - strong language you would not want your child to read - or maybe even yourself. What Not To Knit I can't imagine why she didn't like this monkey gown????? ROTFL! Can't say I'd wear it either but, hmmmm...you know me and sock monkeys....might make a cool afghan for a kid's room,don't you think? [VBG!]

Wednesday, January 16, 2008

I've mostly been knitting but the mitten is wrong side out right now and I didn't feel like turning it right side out to show progress. I have a thumb and the finger flap to do. And then another mitten. LOL! I have to take breaks from projects, especially those that take a lot of time. I will probably have another week with mittens and then a hat to match and then start all over so I'm making it a point to get my tatting time in. This little motif is only started. Looks like a Jane Eborall motif, doesn't it? If you are not familiar with Jane's work, then go see her patterns. I think it's the colors I used along with the shape.
Anyway, it's from this Japanese publication that I bought while I was at Palmettos from Kaye Judt. Why I had to go all the way to SC to buy it, I'm not sure. Perhaps I should check out what she has in Greenfield more often!

I wanted to use more than a single color, just to see how it plays out. I've still got the outer part to do and I'm already disappointed that you can see where I tatted over the end of one thread while beginning. This is the first pattern I've used from this book - it's all diagrams unless you read Japanese and I don't. Can't even figure out small phrases such as "ring" or "chain". There was one motif in particular that made me purchase it and this isn't it. I'm working up to it. LOL! I think it's going to be tricky and since all I have are diagrams to lead the way, it's going to be even trickier. I happened to notice last night that it also has a 3D Christmas tree and some holly and holly berries. I'll have to try those out before the season rolls around again!

Part IV of Jane's Tat It & See series. I think the next step is tomorrow.

Grizzly Mountain Arts certainly keeps coming up with beautiful tatting and needlecraft tools. I love the colors of the celluoid shuttles he is making but I don't like flat shuttles and have enough already for my collection. Now if he would make them into post shuttles, I'd be more tempted. Actually, one of them was...but still too expensive for me.

Well...back to work.

Monday, January 14, 2008

Day 3 from Jane's Tat It & See series. I want to do it over so bad! I forget to leave a space and doing teensy bits like this at a time skews my tension-sensor. But I'll wait...can't be doing every single segment over each time!

Yesterday,at 6:30 p.m. Central Time, Threads From a Tatting Goddess recorded its 100,000th visitor!! Just for the fun of it, I'd like to give this visitor a little momento if I can find out who it is. The visitor is from Pittsburgh, PA and uses Verizon with an ISP of 151.201.129.# (final numbers are not shown). It's someone who already knows the link because a referring URL was not shown. If you recognize yourself as the visitor, please contact me privately at ginab6 at yahoo dot com.

I didn't do much of anything yesterday except clean up and sort files on my computer. It felt like wasted time since there was nothing visible to show for it, but hopefully it means I will be able to find some things easier.

I also slept a lot. LOL! Finally, late in the evening, I knit more on the mitten. I'm using yet a different pattern. I started one the night before and could tell it would be way too big in the ribbing even though a test swatch worked to gauge. I also need to get back to knitting my little beaded amulet bag.